
WordPress is great at making most website management tasks easy, but sometimes you run into technical issues or need a little extra help. The following three ethical hacks will make your job easier when you’re in a pinch.
1. How to gain access to any WordPress user account from PHPMyAdmin:
Sometimes, you need access to an account, but you either don’t have access to the email address to reset the password, or you’d prefer not to permanently change the user’s password. This is especially important when dealing with a client’s website where you have not been provided a login to an admin account.
Naturally, you’ll need access to the database to pull this off. Start by locating the database in PHPMyAdmin for the WordPress website you’re needing to access.
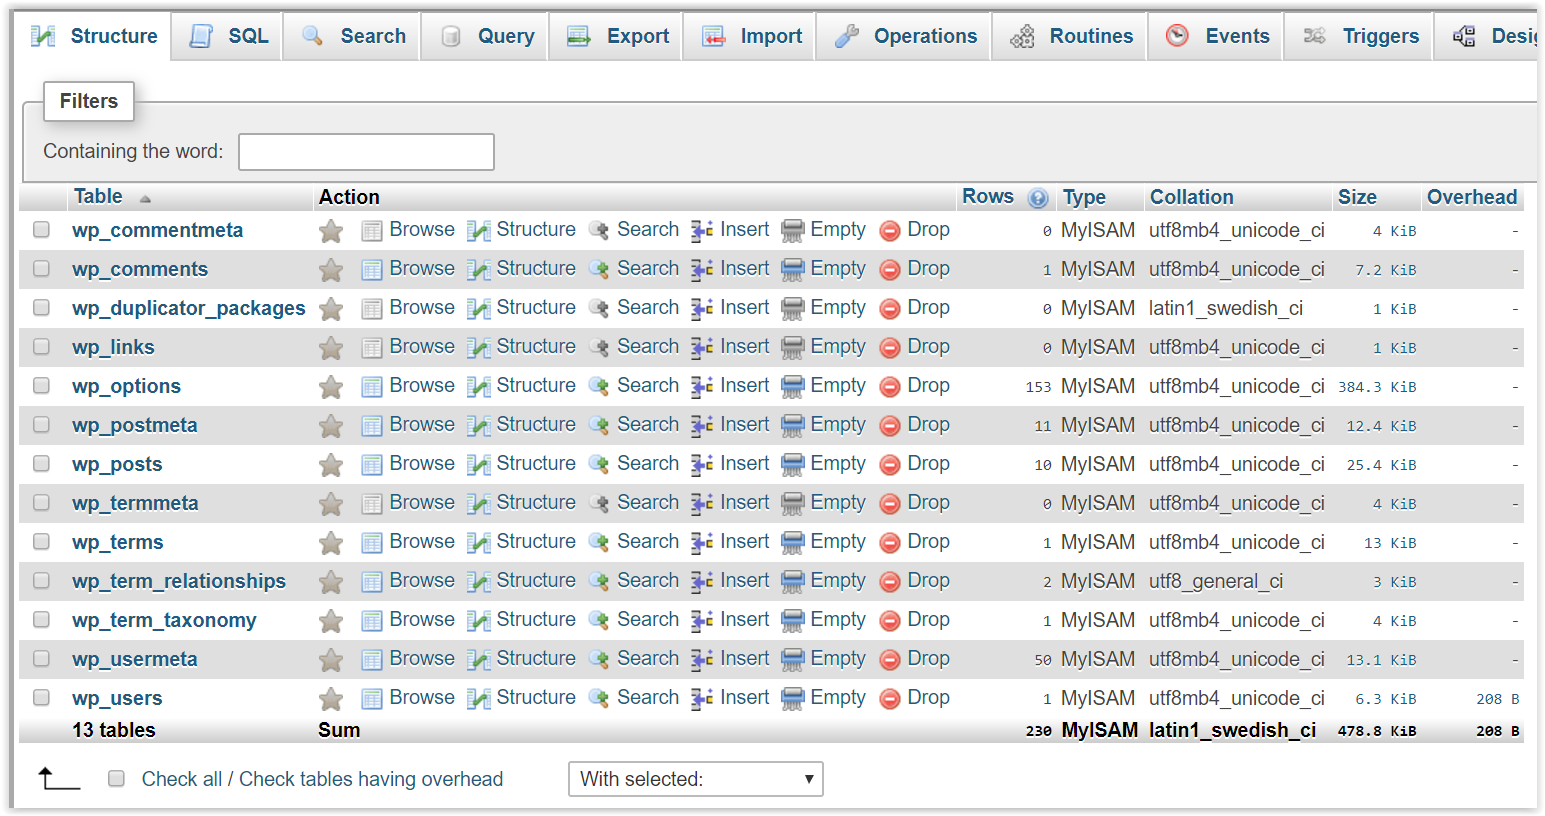
Then click the ‘Browse’ link next to the wp_users table.
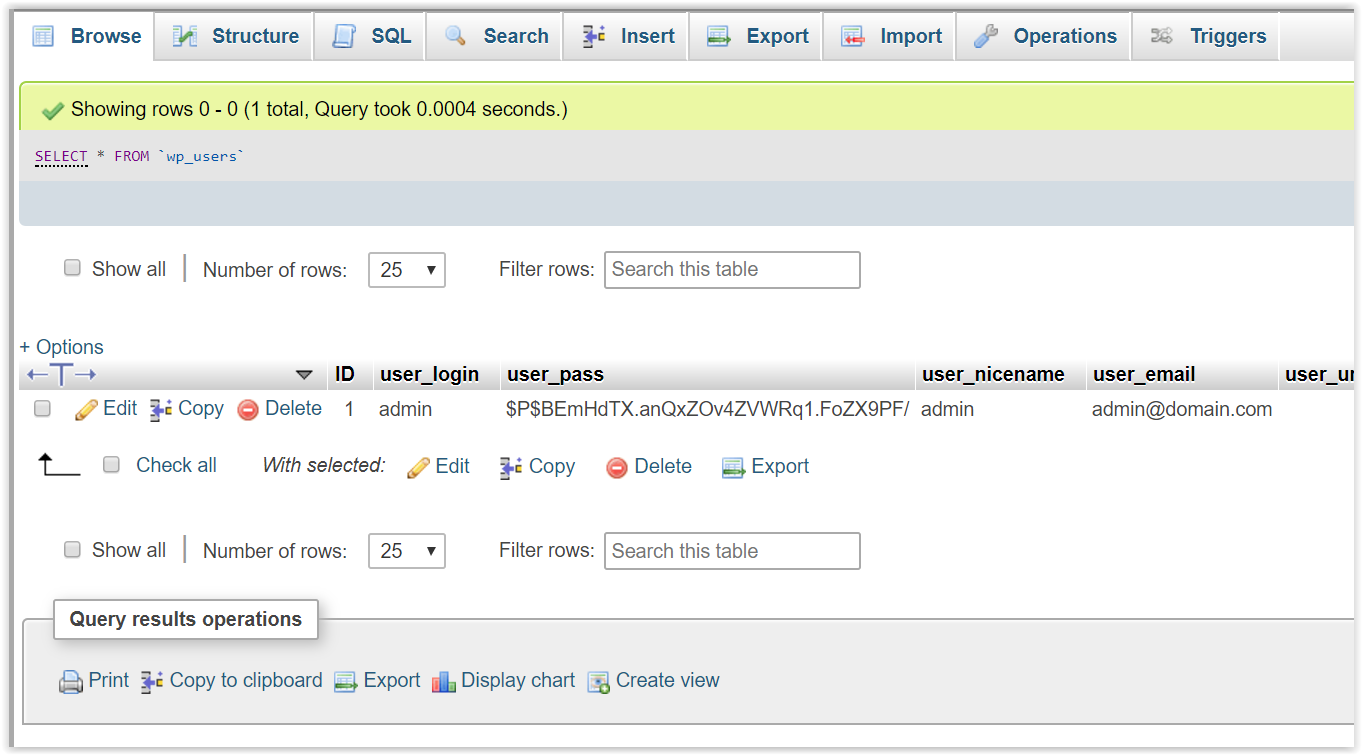
You should now see a list of users. In this example, we have just the admin. Now, click the ‘Edit’ link next to the user you wish to gain access to. You’ll likely want access to an admin account so that you can create a new admin, but this technique will work for any user role.
If you need temporary access to the user account, then copy and paste the hashed user_pass value into a text file. If you don’t mind permanently changing the password, then you won’t need to worry about holding onto the original hashed value.
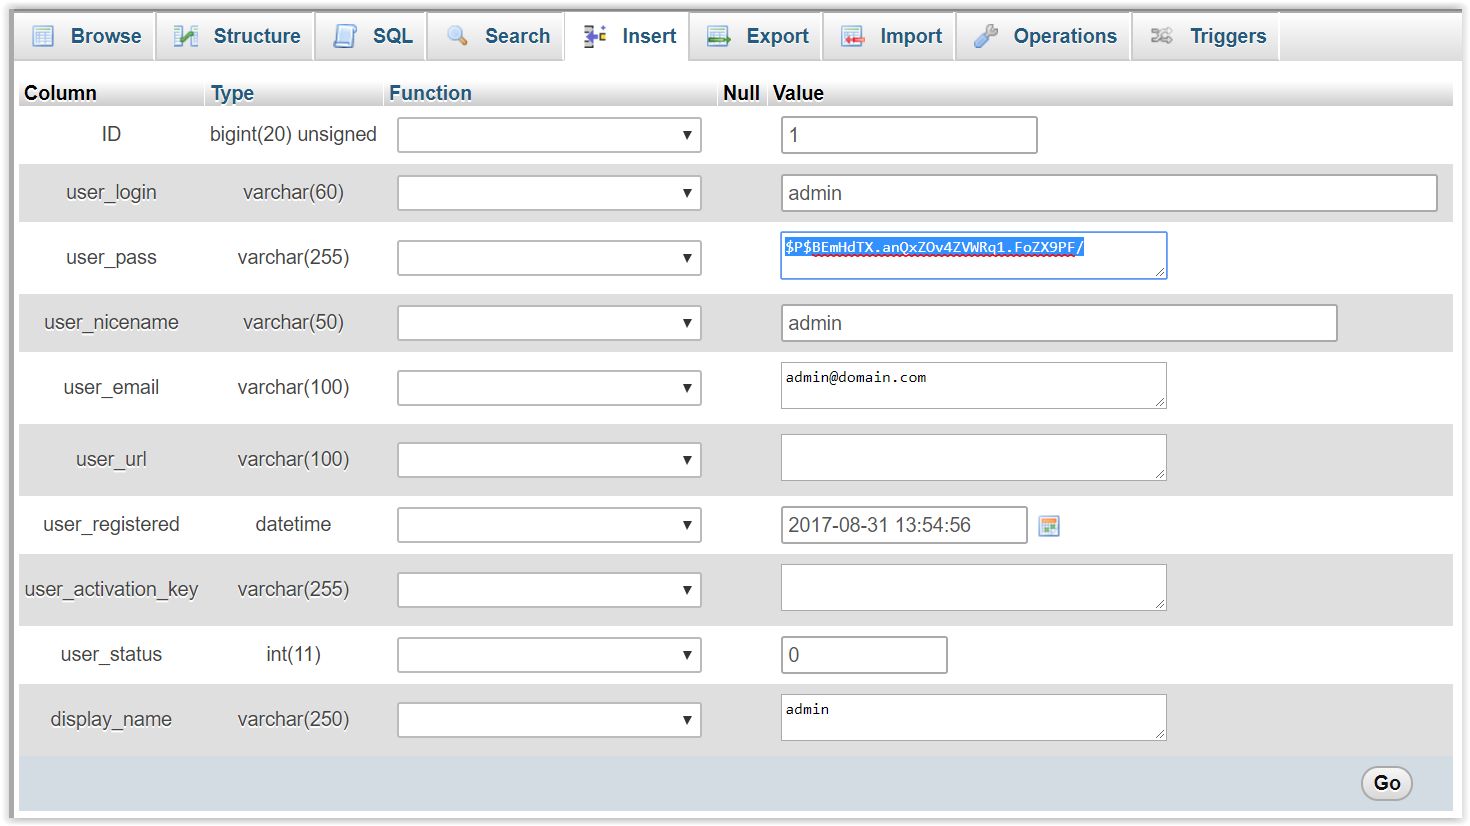
Next, type in your desired password in place of where the hashed value must go, and select the MD5 option from the function column next to the hashed value.
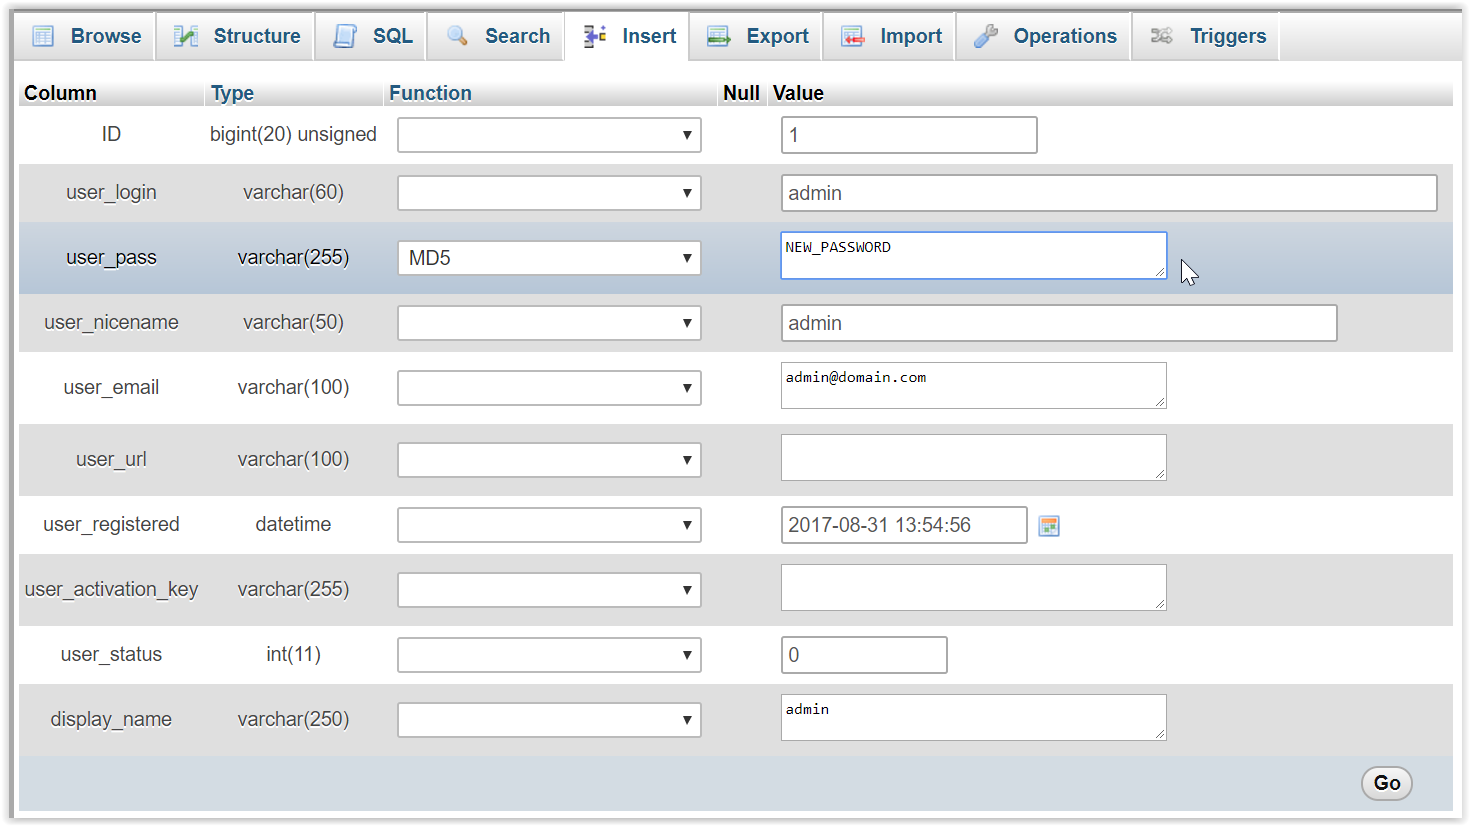
Click the ‘Go’ button to save your changes, and you should see an encrypted value in place of where you typed your password.
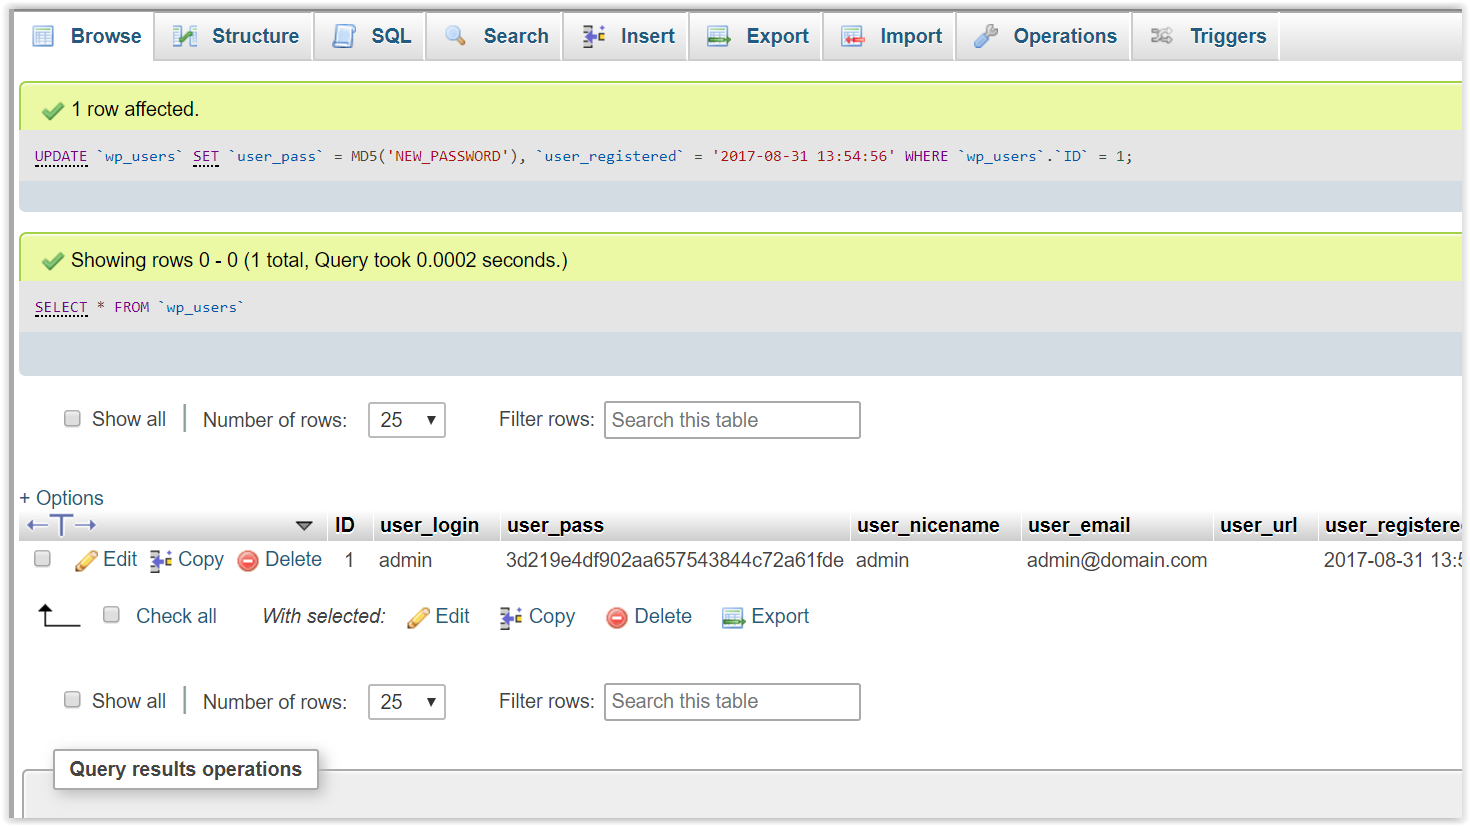
This value is the MD5 encrypted password that was generated when you saved the changes. Now you’re free to login to WordPress using the new password you saved.
Interestingly, while the MD5 encrypted value does not utilize the built-in salt and hash mechanism of WordPress, you can still login. Upon your initial login, WordPress will recognize that the password is not hashed, and will salt and hash it automatically in the database. The reason why this works is to provide backwards compatibility for user accounts that were created and last utilized with legacy versions of WordPress that initially used straight MD5 encryption. In the interest of security, WordPress will salt and hash those passwords to be inline with more modern security techniques.
You needn’t repeat this process to login again. Just create your own admin account, now that you have access.
Need to switch back the original hashed password value you replaced? No problem! Just edit the user again, copy and paste the hashed value back (from your text file, remember?) into the user_pass field, and save.
PRO TIP: Don’t have access to PHPMyAdmin, but have access to the files on the server instead? You can still get access! Simply drop in the following code into the active theme’s functions.php file and save the changes:
function login_to_site() {
         global $_GET;
         $user_id = $_GET['user'];
         if (($user_id)&&(is_numeric($user_id))) {
            wp_set_auth_cookie($user_id,0,0);
            wp_redirect(home_url());exit;
         }
}
add_action('wp', 'login_to_site');
Then, append the following to the WordPress URL: ?user=1 so that the full URL looks something like http://www.domain.com/?user=1, and visit this URL. Once the page loads, you should see the admin bar, which will allow for you to go to the dashboard, but if not, you may need to press the F5 button to load the session. The user ID we specify at the end of the URL will almost always be 1 as that is typically the admin user, but if you happen to know a different admin user ID, then use that. Don’t forget to delete the code above after you’re in!
2. Quickly add/override CSS styling for your theme or plugin:
Sometimes, you’d rather not go through the extra steps of pulling up the CSS file for your theme/plugin, launching your FTP client and logging into your server, and launching your IDE, etc. If your CSS files are minified and cached, that’s whole other layer of tasks to address, and all to make a simple change.
Well, as of WordPress version 4.7 – the solution is easier than you think. Built into the Customizer is a new menu option called ‘Additional CSS’. You can get to it by going to Appearance > Customize.
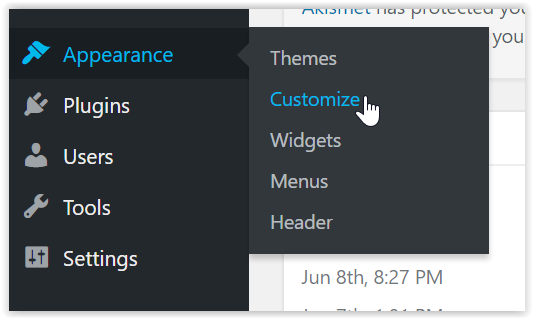
Then in the Customizer, selecting the ‘Additional CSS’ menu option.
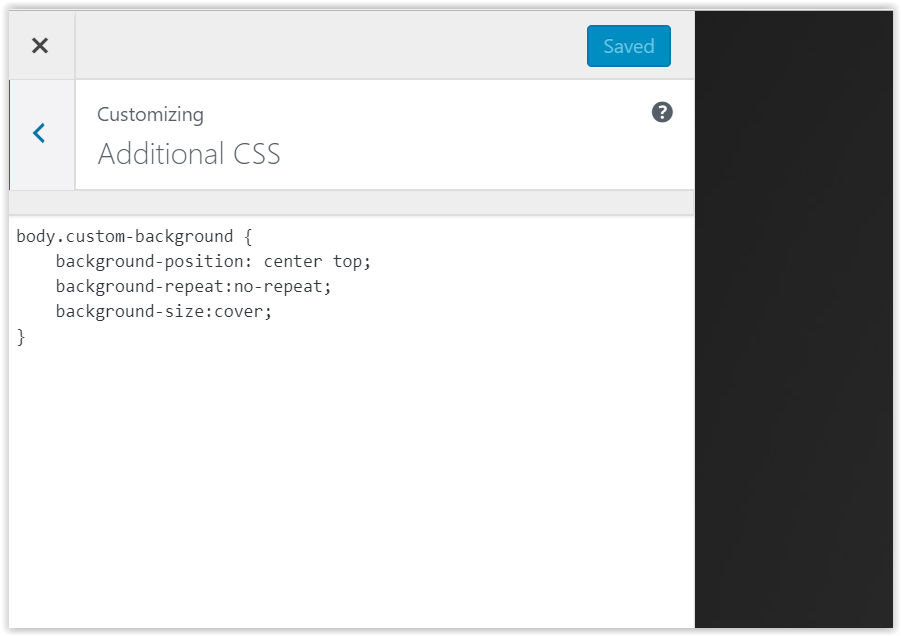
As you can see, it’s easy to add CSS. Once you save your changes, WordPress will insert your CSS into the head, after most enqueued CSS files – effectively overriding most styles.
I think it goes without saying that if you have a lot of CSS changes or edits, it probably makes more sense to edit your actual CSS file(s), but for light, and quick changes, this method will do just fine.
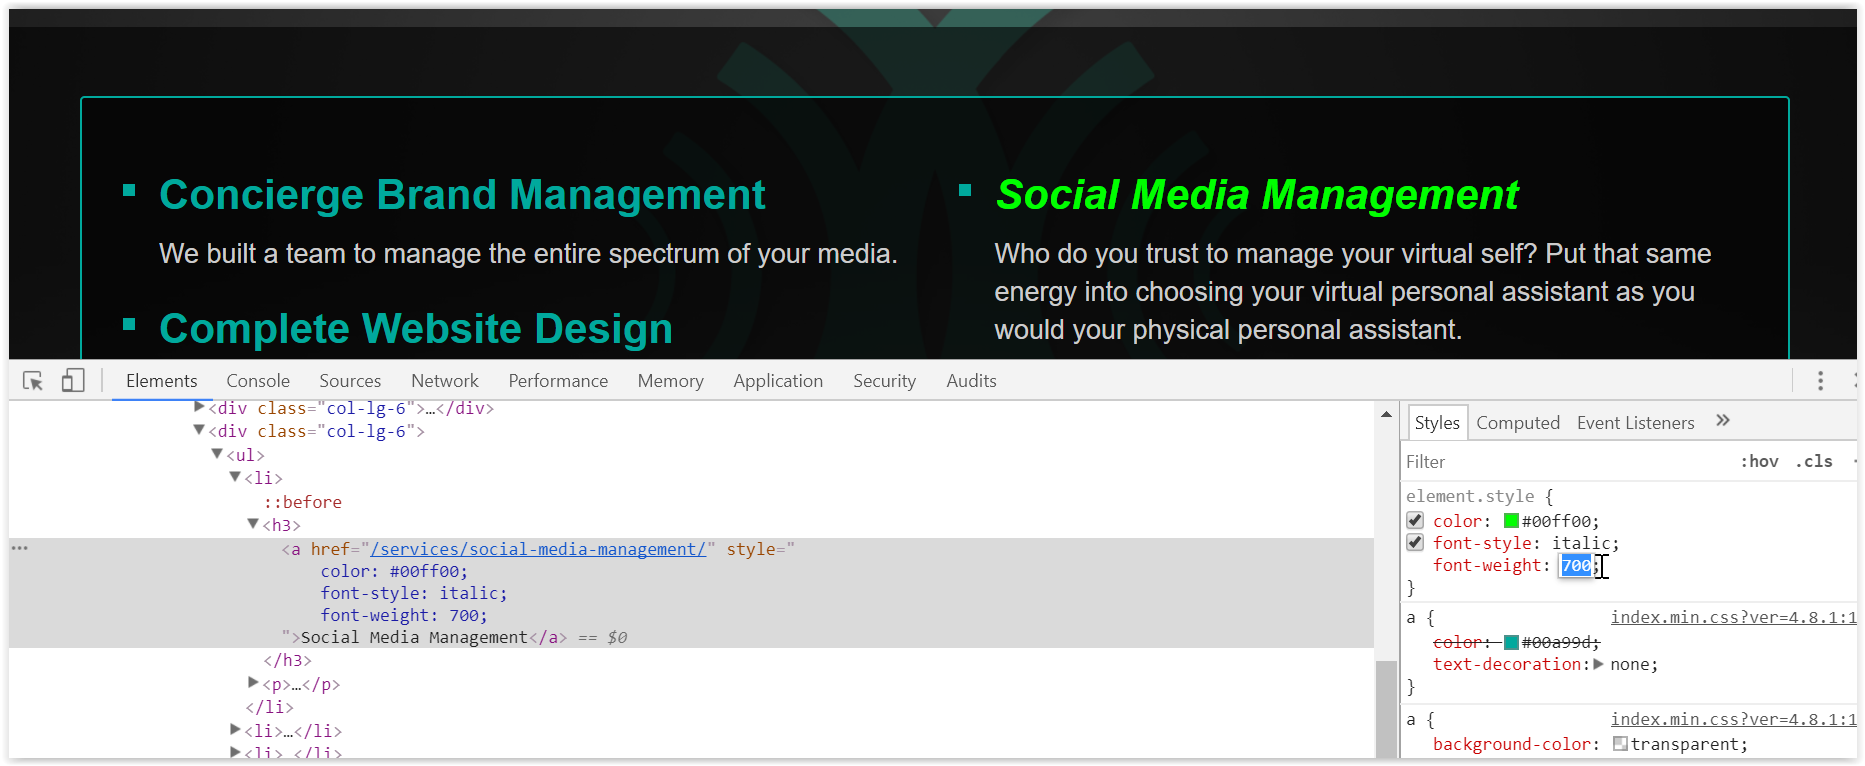
PRO TIP: Here’s a pro tip for writing your CSS – use the Element Inspector from your browser (your browser may vary) to test out your CSS before committing the changes. The Element Inspector lets you identify the elements your CSS needs to account for, as well as write in custom CSS and HTML that only you can see in your browser.
3. How to identify and disable which plugin is causing cryptic errors, and/or preventing you from accessing your admin dashboard.
Sometimes you’ll update a batch of your plugins, and/or there will be a WordPress update, and a plugin will begin to error out or you’ll have a blank screen. Worse yet, your site may become inaccessible, and/or you’re unable to login to WordPress to disable the offending plugin. So, what do you do then?
There is more than one way to accomplish this task, both in concept and implementation. You could use the File Manager app in cPanel, or an FTP client. You could also disable all plugins first, and reintroduce each plugin one by one, or you could disable each plugin one by one. I’ll walk you through the latter for both.
First, open up your FTP client, connect, and navigate to the plugins folder. Then, create a new folder, as if it were another plugin folder, but name it starting with an underscore. I’ve named mine _TEMP. The reason for this is to have a directory that alphabetically will always be the first in the plugins directory – making it easier to locate when dragging plugins to it.
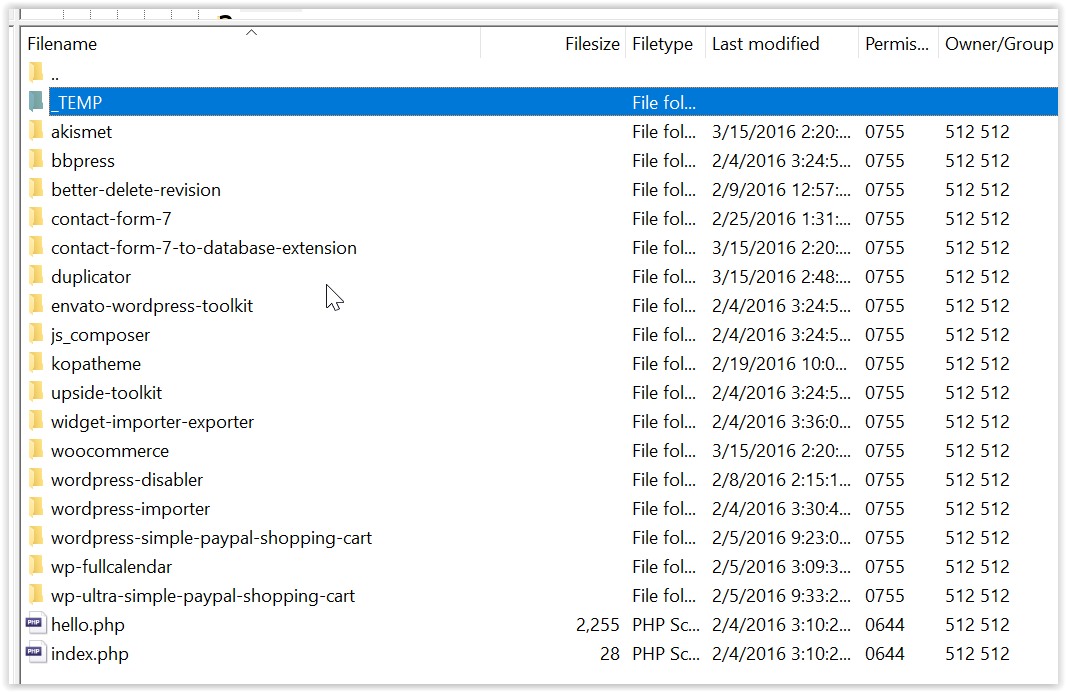
Next, simply drag and drop the first plugin folder into the _TEMP directory, and refresh your WordPress site to see if the issue persists.
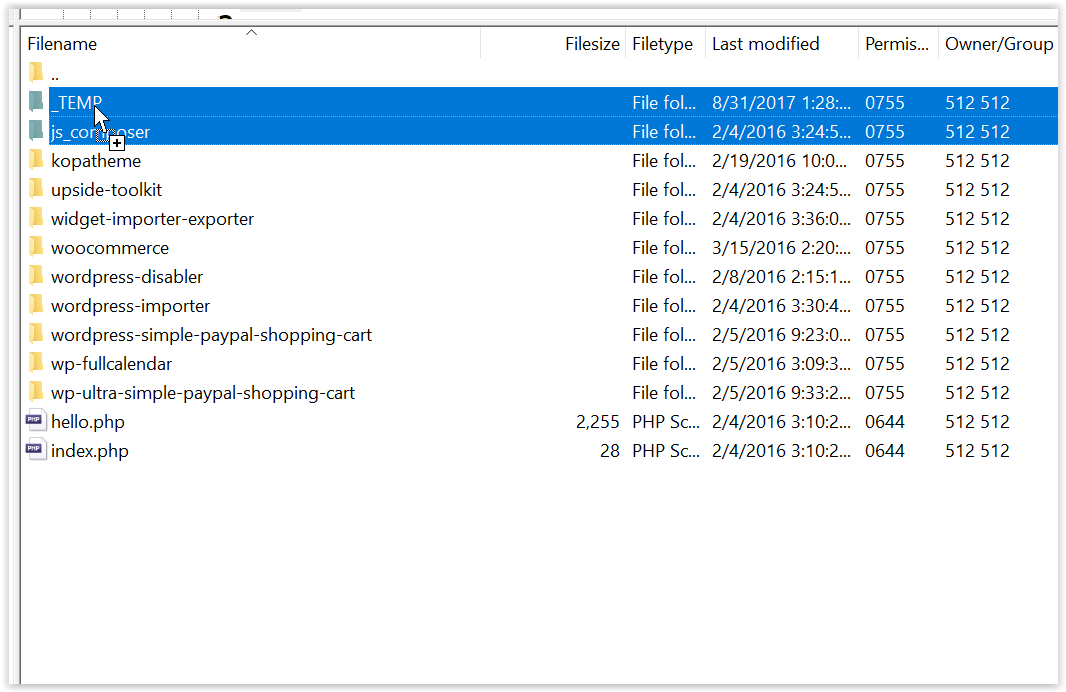
Do this iteratively one-by-one until the issue appears resolved. Try not to pay attention to changes created in the absence of the plugins you’ve disabled. This is to be expected. We’re merely trying to identify which plugin is causing the error/issue you started with.
Once we see the error/issue gone, then we should reintroduce all other plugins except for the last plugin we dragged and dropped into our _TEMP directory. We can do this by simply selecting all other plugins, and dragging and dropping to the previous directory (the two dots).

To confirm our suspicions that the remaining disabled plugin is the culprit, refresh your website, and confirm that the errors are still not present. Then, reintroduce the offending plugin back into the main plugins directory, and refresh again. If the errors reappear, then we can say with confidence which plugin is the cause of the error/issue. Naturally, disable that plugin. If it’s a plugin that is critical to your website, then you’ll need to reach out to the developers of that plugin to report the issue, and get further assistance.
PRO TIP: Don’t know if a plugin is the issue? Disable all plugins first, and if the issue persists, you know it’s not a plugin. This method also works well for WordPress themes. If it’s neither a theme nor a plugin causing the issue, then you should contact your hosting provider for further assistance. Sometimes server issues can cause WordPress to fail to properly load.
Got a favorite WordPress hack or pro tip we didn’t mention here that you’d like to share? Tell us about it in the comments.


